Marla asked if I would make a quilt for a very ill friend. I have a hard time saying no to a friend, so I said sure - what did she have in mind. Her friend Jim, loved the west coast and sailing. She gave me the above pix that his daughter took on one of their trips. As you have guessed, Jim unfortunately, has since found his regatta in the sky. However, she still wants the quilt, which I will call "Jim's Regatta". I came up with the design below - sketched out in EQ7. If you've ever been out to Canada's west coast, you know there are mountainous islands that are surrounded by water and often hazy sky so that it's hard to tell where the water ends and sky begins.

I designed the sailboats to look like the boats in the pix above - or at least a reasonable facsimile. I pieced a few of them together but just didn't like the result - in spite of being very careful when I cut the pieces, the thing just wasn't going together as well as it should have. I redesigned a couple of designs, but to no avail. The biggest issue is that the tips of the sails are clipped when the 1/4 seam is taken into consideration (below - see the tip on the right - way too close to the edge of the block - this one is an 8" block). What to do, what to do?
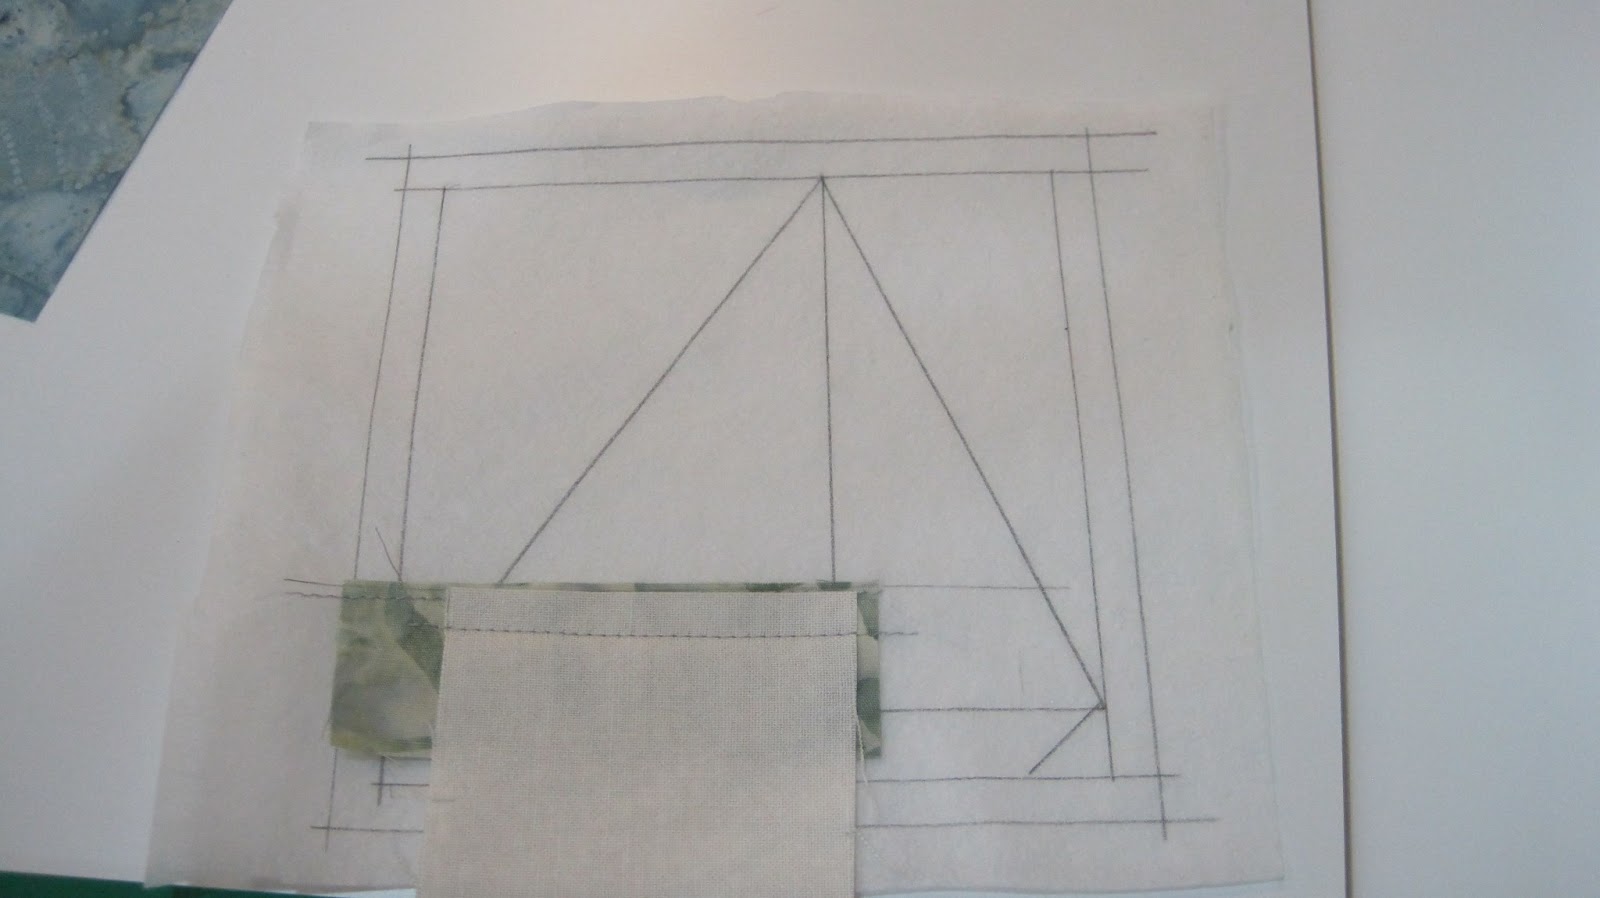
I decided to try the following method - is this called foundation piecing? Not sure - one of the things I would probably learn if I ever took a quilting class! Anyway - I cut a piece of very thin non-woven interfacing to use as a backing and drew the boat on it (this one is for a 4" block).
The trick to this is determining the right order of putting the fabric on the backing.
I started stitching the fabric on - first piece above - just flat on. This is the "sky" between the hull and the mainsail.
Next is the mainsail. We don't want any raw edges in the final product so need to draw on the 1/4" seam allowance, line up the sail fabric, stitch so that the stitching lands exactly on the bottom edge of the sail (above). Then below, flip it up into position and press. I also stitched down the right edge just to hold it in place, but far enough to the right that the stitching will be hidden by the jib - don't you love that I know these nautical terms? :)
Now for the "sky" to the left of the mainsail. Calculate the seam allowance - stitch, fold into position and press (something went wrong with the pix of the stitching step and I had to delete it - but the principle is the same as above and further below).
On to the jib. Same method - measure seam allowance, stitch, fold back, press.
"Sky" to the right of the jib. Same method.
Now for the hull - yup same method! But first I wanted to show you how I marked the lines to measure the seam allowance where I couldn't see them from the front. Flip over the block and stick pins through to the front at a couple of points (below).
Flip the blocks (below) then mark where the pins come out on the front with a small dot (make sure you can actually see it!). And yes - I just used an ordinary mechanical pencil. I have no class.
Then (below) mark the seam allowance lines.
Fold back and press.
Then trim it all up and voila! A much better sailboat (above). Below are a few pix of the quilt under construction - with a bunch of the yucky sailboat blocks so you can see where the sails are clipped - maybe I'll just say they are "clipper ships"! I am not replacing them or taking the darn thing apart. It will just be one more of my "learning quilts" - I have so many! I wanted to sort of blend from pinks (sunset) to blues and greys. Not sure that I'm really succeeding in that - I guess that's the next thing I need to work on - colours. I have great ideas, just a bit of trouble with the execution.... Stay tuned.